Monday, April 30, 2012

Print Making Train: Print making was one our our more difficult projects.  First one has to make a design on their square. Once the design is etched in nicely you take a roller with a thin amount of paint and roll it onto the square.  Once it is painted on you take the square and press it onto another piece of paper.  For this project we had to make a rail car and depict South Dakota in the background.  I chose to make my background a field with intermittent corn.
Extension Project: This can go along well with a unit on South Dakota and use it as a way to talk about the different scenery from East to West South Dakota.


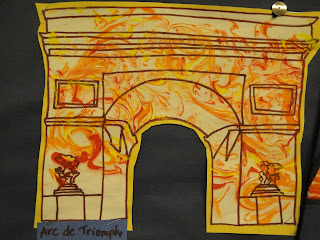
Marbling was a different project.  Once we drew our landform, we took shaving cream and put it into a pan.  We then took 3 colors of paint and put many small dots of paint.  After the paint was on top of the shaving cream I took a tool to create movement with the paint and shaving cream.  I then pressed my picture into the paint shaving cream mix.  You then lift it out and scrape off the excess shaving cream and paint and let it dry.
Extension Project: This could be used in social studies on unit involving different landforms or trademark places in different places around the globe.
 By using Eric Carle's painting and then cutting out technique this version of The Hungry Caterpillar was created.  First we all painted different sheets of paper with different textures, movement, and colors for us to use when creating this.  We used Eric Carle's technique of drawing our piece first and then using it to trace around on the painted sheet to then paste it onto our paper to create our story.
Extension Project: Student could get put into groups to write a story of their choice.  Once their story is written students would then use this technique to add illustrations to their story.  By doing this there would be home made books created for the class and the students would use their writing skills and also their art skills to create something for the whole class to use and bring them back to when they have read Eric Carle books on their own.


My lei is pau!  First we used 2 different water color techniques to paint, I used crayon and dry brush.  Once we had painted our sheet we then cut out 20 different flowers out of colored construction paper.  We placed a hole punch in the middle of each.  We also cut out 4 flowers from out water color paper.  Once all of our flowers were cut out we cut short straw to put in between each flower.  After it was all strung we took a class photo with out lei's to show what we learned about Hawaiian culture.
Extension Project: This project could be connected to learning about other cultures in our classroom.  Each student could come in and talk about an aspect of their culture that means a lot to them and show us something that they would do to bring that piece of culture out more in their daily lives.  It could be something like lei's, food, or even animals.  
 Up and Down Town: This was created by making my paper 3-D.  Once again, complementary colors were used to create this.  By cutting different lengths and widths with my construction paper I made many different shapes or 3-D representations.  This was done by only glueing down the ends of the strips of paper.  I used things like just folding it back and forth to create stairs, I wrapped some around my pencil to give it a curly cue effect, and I also created a triangle tunnel.  Some other things were done just by using imagination like my arches and shapes.
Extension Project: Another way to use this project would be in comparing 2-D and 3-D and the importance of both.  By looking at this project in just a picture one would not be able to tell that it is actually 3-D and the differences and likenesses can be discussed about both. Also, how one can make something look 3-D in a 2-D project.


By using the coiling technique a coil pot was created.  This was done by making long cylinders out of the clay and then having them places on top of each other to create the pot.  After it was all together one had to smooth out the inside to make sure that one could not see the coils.  On the outside I used red paint to cover the inside of the pot and orange on the outside.  I also put 5 hearts, 2 large, 3 small.  These depict my family because they are so important to me and I did not think just one was enough to show all of them.  
Extension Project: To tie in having a symbol on the outside of the pot one could use this requirement in writing or language arts.  Instead of writing just 3-5 sentences a student may have to write a 1-2 page paper on why they chose each thing on their pot.  This would help students with their writing skills and also force them to think about why they truly put that symbol on their pot.

By using crayon, we created a hot and cold animal puzzle.  Each students received a puzzle piece to use.  First students were given their color scheme, hot or cold colors, and then they were instructed to pick a animal. Examples of 4 animals were given and students were instructed to only use one of their colors, ie. yellow only on the duck.  Also, texture was to be used on the inside of their animal, it; it could either be drawn in or one could use real texture to color in their animal.  Once their  animal was complete students received at random another art element to fill the background of their puzzle piece.  Mine was lines.  I used many different types of lines to fill in the background.  Other elements used were pattern, geometric shapes, and organic shapes.
Extension Project: An extension of this could be done when warm and cold blooded animals are being discussed in science.  Most students stuck to animals that related to their color scheme, ie fish and frogs for cold and ducks and foxes for hot.  This could be done by having all students sticking to that criteria, only warm blooded animals for the hot or warm colored puzzle and only cold blooded animals for the cold color puzzle.  This would help student remember what animal belongs where and it also gets them to use their imagination.


This is a picture of the bulletin board created after the puzzle pieces were put together.
This is my plaid bunny.  We accomplished this by first being assigned complementary colors to paint with.  We were instructed to pic one color fist and paint straight lines.  Once those were dry we took the other color and painted the opposite direction with different thicknesses in lines to created a plaid sheet of paper.  Once our painting was dried, we took stencils to cut out each part of our bunny and then put it all together, backed it and put the final touches on the face and tail.
Extension Project: This could be used in a math classes when lines are being taught.  One could connect it to math by bringing in math requirements into the lines, like length, thickness, and width apart.  This would help students with their measuring skills and show their knowledge of lines.

By using white crayon and the wet on wet technique we created paintings with flowers on them.  We were required to have three flowers and at least one primary and one secondary color.  The wet on wet technique made it so the colors "bled" a little to make the picture look like it had no defined line besides what was drawn before we painted.
Extension Project: An unit that could go along with this project would be the life cycle of a plant in science.  By learning what should be included on each flower one can paint flowers at different stages and also in environments where the growing would prosper.  A new requirement for the same project would be to draw three flowers, each at a different stage in its life.

Friday, February 17, 2012


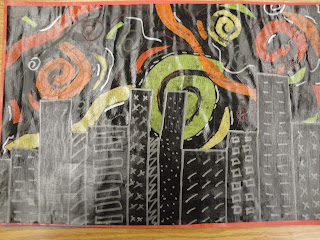
This is a depiction of Van Gough's Starry Night, meant for upper elementary students.  We used cut out tissue paper to depict the sky, to our liking, to show movement and the different ways it can be used in a "sky".  Then we used another piece of construction paper to cut out a cityscape.  After they were all glued on we used a glossy, glue top coat to get the glossy feature across the whole piece.  Once it was all dry, one could use either silver sharpie markers, or oil pastels to show more movement throughout the sky, and the city.  An extension to this project could be when we are tlaking about different cities, that would have things like this cityscape and how differently eveyone sees the sky from where they live. 


This was a finger painting, using my own rendition of Van Gough's Starry Night.  I used finger painting to create the different planes.  The dark blue, with some purple, sky and stars are showing the movement through space. Then we have the middle ground/plane that depicts our rolling hills, with a tree that is close to us, so it appears bigger than the rest.

Thursday, February 9, 2012

Examples of Elements and Principles of Art


Value - Prom Dress


Movement -
Mitchell warming up for a match


Contrast - Flowers


Texture - Grand Canyon


Geometric Shapes - Graduation Hats

Thursday, February 2, 2012

Foot Intorduction Activity

Extension Activity: An extension to this activity on getting to know your students would be to tie it into a lesson.  You could tie it into social studies by having some of the requirements for what to include by making them put things like where they are from on there, their family, something they like in the subject, and a few "fun facts."  It can help you assess what your students are going to like in the content and could also tell you what they like to do in the class, ie. projects, movies, lecture, etc.


In this introduction activity I cut out my feet and included facts about myself on it.  The cowboy boot represents my country style and my love for all types of shoes.  The iPod and head phones represent my love and need for music in my life.  I included a tent with the initials of my family members on it because we have camped for many years and I am very close with my family.  The books, water bottle, and Mtn. Dew can represent things that are a constant in my life; I love reading for fun and my two favorite liquids.  Finally the state of Minnesota represents where I am from.